


How to Create a Business Card in Canva (Free Template Guide)
Whether you’re a freelancer, small business owner, or just starting your career, a professional business card is still one of the most powerful networking tools you can have. The good news? You don’t need to hire a graphic designer or learn complex software to make one. Canva makes it surprisingly easy — and with dozens of free templates available, you can have a polished, print-ready business card in under 30 minutes.
In this guide, we’ll walk you through everything you need to know: how to choose the right template, customize your design, add your brand elements, and download your card ready for printing.
1. Why Use Canva for Business Cards?
Canva has become one of the world’s most popular design platforms, and for good reason. It strikes the perfect balance between ease of use and professional output. Here’s why it’s an excellent choice for creating business cards specifically:
- No design experience required. Canva’s drag-and-drop interface means anyone can create something that looks great.
- Hundreds of free templates. You don’t need to start from scratch — just pick a layout that fits your style and industry.
- Correct dimensions out of the box. Business cards are a standard 3.5 × 2 inches (or 88.9 × 50.8 mm), and Canva templates are pre-sized to match.
- Print-ready downloads. Canva lets you export your design as a high-resolution PDF with bleed marks, ideal for professional printing.
- Free tier is genuinely usable. Unlike many tools that lock core features behind a paywall, Canva’s free plan gives you access to thousands of templates and design elements.
If you’ve ever struggled with tools like Adobe Illustrator or InDesign, Canva will feel like a breath of fresh air.
2. What You’ll Need Before You Start
Before jumping into Canva, gather the following information so you’re ready to fill out your card:
- Your full name
- Job title or role
- Company name
- Phone number
- Email address
- Website URL (if applicable)
- Social media handles (LinkedIn, Instagram, etc. — only include the most relevant ones)
- Your logo (PNG with a transparent background works best)
- A professional headshot (optional, but great for personal brands and real estate professionals)
- Your brand colors and fonts (hex codes are ideal)
Having all of this ready before you open Canva will make the whole process much faster and more focused.
3. Step 1: Set Up Your Canva Account
If you don’t have a Canva account yet, here’s how to get started:
- Go to canva.com.
- Click “Sign up” in the top right corner.
- You can register with your Google account, Apple ID, Facebook, or email address.
- Choose the Free plan — you won’t need Canva Pro for this guide.
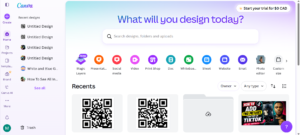
Once you’re logged in, you’ll land on the Canva home dashboard. This is where you can start new designs, access recent projects, and browse templates.
Pro Tip: If you’re creating a business card for a company, consider signing up for a Canva for Teams account. It allows multiple team members to collaborate on designs and share brand kits — though this is a paid feature.

4. Step 2: Choose a Business Card Template
Now for the fun part — picking your template.
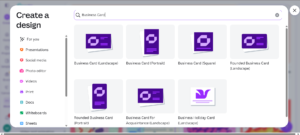
How to Find Business Card Templates
- From the Canva home dashboard, click the search bar at the top.
- Type “Business Card” and press Enter.
- You’ll see a gallery of templates. On the left sidebar, you can filter by:
- Free (to see only templates available without a Pro subscription)
- Style (minimalist, modern, elegant, etc.)
- Color (if you already have a brand color in mind)
- Industry (photography, real estate, creative, corporate, etc.)
Choosing the Right Template
With so many options, it can feel overwhelming. Here are a few tips to narrow it down:
- Match your industry. A bold, colorful template might suit a graphic designer but feel out of place for an accountant or lawyer. Think about what your clients expect from your profession.
- Keep it readable. The best business card templates have clear hierarchy — name stands out, followed by title, then contact details.
- Consider a two-sided design. Many templates include a front and back. Using the back for a tagline, services list, or QR code makes your card work harder.
- Think about printing. Very dark backgrounds are dramatic and look great on screen, but make sure you’re comfortable with the printing cost (dark cards sometimes cost more to print).
Once you’ve found a template you like, click on it and then click “Customize this template” to open it in the Canva editor.

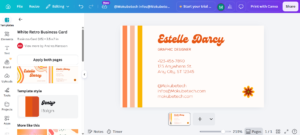
5. Step 3: Customize Your Text and Contact Info
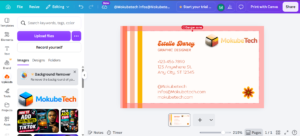
With your template open, you’ll see all the placeholder text waiting to be replaced with your information.
Editing Text Fields
- Click on any text element to select it.
- Double-click to enter editing mode.
- Highlight the placeholder text and type your own information.
- Press Escape or click elsewhere to deselect.
Formatting Text
When a text box is selected, the top toolbar shows formatting options:
- Font family — Click the font name to browse and search for alternatives.
- Font size — Adjust using the number field or the + / − buttons.
- Bold, italic, underline — Standard formatting toggles.
- Text color — Click the colored square to open the color picker.
- Alignment — Left, center, right, or justified.
- Spacing — Adjust letter spacing and line height for a more polished look.

What Text to Include
A great business card is concise. Here’s what to prioritize:
| Priority | Element | Notes |
|---|---|---|
| Must-have | Name | Use your preferred professional name |
| Must-have | Title/Role | Keep it clear and recognizable |
| Must-have | Use a professional domain, not Gmail if possible | |
| Must-have | Phone | Direct line is better than a general number |
| Optional | Website | Only if it’s current and professional |
| Optional | Social handles | Max one or two — only if relevant |
| Optional | Address | Only if you have a physical location clients visit |
Tip: Less is more. A cluttered business card is harder to read and looks unprofessional. If you’re torn about including something, leave it out.
6. Step 4: Add Your Logo or Photo
Your logo is one of the most important brand elements on your card. Here’s how to add it properly.
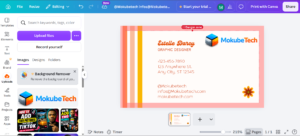
Uploading Your Logo
- On the left sidebar, click “Uploads”.
- Click “Upload files” and select your logo from your computer.
- Canva accepts PNG, JPG, SVG, and other common file formats.
- Once uploaded, click on your logo to add it to the canvas.
- Drag it into position and resize by pulling the corner handles (hold Shift to maintain proportions).
Best practice: Use a PNG file with a transparent background. This prevents an awkward white box appearing around your logo on colored backgrounds.

Removing the Background from a Logo (Canva Pro)
If your logo has a white background and you’re on Canva Pro, use the Background Remover tool:
- Select your uploaded logo.
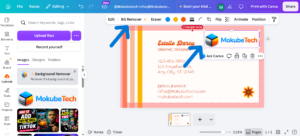
- Click “Edit image” in the top toolbar.
- Click “Background Remover” and wait a few seconds.
For the free plan, you can use free external tools like remove.bg to remove backgrounds before uploading to Canva.

Adding a Headshot
For personal brands — coaches, consultants, real estate agents, speakers — a professional headshot on your business card helps people remember your face.
- Upload your photo the same way as your logo.
- Place it in a designated photo placeholder if the template has one, or resize/position it manually.
- Use Canva’s crop tool (double-click an image to access it) to frame your face well.
7. Step 5: Adjust Colors and Fonts to Match Your Brand
Your business card should feel like a natural extension of your brand — not just a generic template with your name on it. Here’s how to make it truly yours.
Changing Colors
- Click on any colored element (background, shape, text).
- Click the color swatch in the top toolbar.
- Enter your brand’s hex color code directly (e.g., #2D6A4F for a deep green).
- To apply a color to multiple elements at once, use Ctrl/Cmd + A to select all, then change the color.
Canva Color Palette Feature
Canva allows you to save custom brand colors:
- Go to Brand Kit (available in free and paid plans).
- Add your brand colors so they’re always one click away in any project.
Changing Fonts
Templates come with preset fonts, but you can change them to match your brand:
- Select a text element.
- Click the font name in the toolbar.
- Search for your preferred font or browse by style.
- Apply it to all similar text elements for consistency.
Font pairing suggestion: A clean sans-serif for your name (like Montserrat or Raleway) paired with a simple serif or light sans-serif for contact details creates a professional, readable hierarchy.
8. Step 6: Review Both Sides of the Card
Most business card templates in Canva include two pages — front and back. Don’t neglect the back.
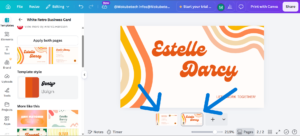
How to Navigate Between Pages
At the bottom of the editor, you’ll see thumbnails for each page. Click between them to switch.
Ideas for the Back of Your Card
The back of a business card is valuable real estate. Consider using it for:
- A tagline or value proposition (“Helping small businesses grow online”)
- A list of key services (3–5 bullet points max)
- A QR code linking to your website, portfolio, or booking page
- A loyalty stamp grid (for cafes, salons, or service businesses)
- A map or address (for physical locations)
- Social media icons with your handles
- A blank space for handwritten notes (simple, but surprisingly appreciated)

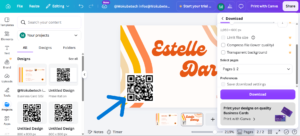
Adding a QR Code
- On the left toolbar, click “Apps” (or “More” depending on your Canva version).
- Search for “QR Code”.
- Enter the URL you want the QR code to link to.
- Click generate, and Canva will add it directly to your canvas.

Related Articles
Create a QR Code for Any Website Link Using Canva (Step by Step)
9. Step 7: Download and Print Your Business Card
Once you’re happy with your design, it’s time to download it for printing.
Downloading from Canva
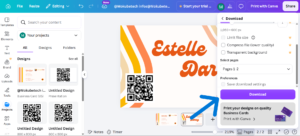
- Click the “Share” button in the top right corner.
- Select “Download”.
- Choose your file type:
- PDF Print — Best for professional printing (includes bleed and crop marks)
- PNG — Good for digital use or home printing
- JPG — Compressed; fine for proofing but not ideal for printing
- Check the box for “Crop marks and bleed” if sending to a professional printer.
- Click “Download”.
Printing Options
Option A: Print at Home Use cardstock paper (at least 80 lb / 216 gsm) and a color laser printer for best results. Cut with a paper trimmer for clean edges.
Option B: Online Print Services Sites like Vistaprint, Moo, GotPrint, or PrintingForLess accept Canva PDF files. They offer professional finishes like glossy, matte, soft-touch laminate, and spot UV.
Option C: Local Print Shop Great for fast turnaround. Bring your PDF file on a USB drive or email it over. Ask for a proof before printing a full batch.
Recommended specs when printing:
- Resolution: 300 DPI minimum
- Color mode: CMYK (Canva Pro exports in CMYK; free plan exports in RGB — ask your printer if this matters)
- Bleed: 0.125 inches on all sides

10. Free vs. Pro Canva Templates — What’s the Difference?
Canva’s free plan is genuinely capable, but it’s worth knowing where the limitations are.
| Feature | Free Plan | Canva Pro |
|---|---|---|
| Business card templates | 1,000+ | 5,000+ |
| Background remover | ❌ | ✅ |
| Brand Kit (custom fonts/colors) | Limited | Full access |
| Magic Resize (resize for other formats) | ❌ | ✅ |
| CMYK download | ❌ | ✅ |
| Premium elements/photos | ❌ | ✅ |
| Premium stock photos | ❌ | 100M+ |
| Storage | 5 GB | 1 TB |
Verdict: For most people, the free plan is more than enough to create a professional-looking business card. Canva Pro becomes worth it if you’re managing brand assets across multiple designs, need CMYK output, or use Canva regularly for your business.
11. Best Practices for Business Card Design
Even with a great template, a few design principles will take your card from good to excellent:
1. Keep It Simple
Resist the urge to add everything. Your card is not your website. Give people just enough to know who you are and how to reach you.
2. Make Your Name the Star
Your name should be the largest, most prominent text element on the card. It’s the one thing you always want people to remember.
3. Use High Contrast
Text must be easy to read. Dark text on a light background (or light text on a dark background) is the safest approach. Avoid light gray text on white — it looks elegant on screen but disappears in print.
4. Respect the Safe Zone
Keep all important text and logos at least 5mm away from the edge of the card. Printing is never perfectly precise, and elements too close to the edge risk being cut off.
5. Choose a Legible Font Size
Body text (email, phone, website) should be no smaller than 8pt. For anything under that, most people will need to squint — or won’t bother reading it at all.
6. Consistency Is Brand Trust
Your business card should match the visual identity of your website, social media profiles, and other marketing materials. Consistent colors and fonts build recognition over time.
12. Common Mistakes to Avoid
Here are the pitfalls that make business cards look unprofessional — and how to sidestep them:
Using a personal email address. A Gmail or Hotmail address makes you look less established. If you have a domain, use it for email. If not, consider getting one — they’re inexpensive.
Outdated information. Always double-check that your phone number, email, and website are current before printing. Nothing’s worse than handing someone a card that leads nowhere.
Too many fonts. Stick to two font families maximum. More than that looks chaotic and amateur.
Low-resolution images. If your logo or photo looks blurry in the Canva editor, it will look even worse in print. Source or recreate assets at a minimum of 300 DPI.
Ignoring the bleed. If you’re printing professionally, always export with bleed and crop marks enabled. Without bleed, you’ll get thin white lines around the edges of your card.
Going too trendy. Design trends change. A card that looks ultra-fashionable today might look dated in two years. Classic, clean design has a longer shelf life.
13. Frequently Asked Questions
Is Canva really free for business cards?
Yes. Canva’s free plan includes access to thousands of business card templates, text editing, logo uploading, and PDF download. You only need Canva Pro for advanced features like background remover, CMYK download, or premium templates.
What size should a business card be in Canva?
The standard business card size is 3.5 × 2 inches (or 88.9 × 50.8 mm). Canva’s business card templates are already set to this size, so you don’t need to adjust the canvas manually.
Can I use Canva business cards for printing?
Absolutely. Canva allows you to download your design as a print-ready PDF with crop marks and bleed. This file can be sent to any professional print service or local print shop.
Can I design a double-sided business card in Canva?
Yes. Most Canva business card templates already include two pages — one for the front and one for the back. When you download as a PDF, both pages are included in a single file.
How do I make a QR code on Canva?
Use the built-in QR Code app within Canva. Go to Apps in the left sidebar, search for “QR Code,” enter your URL, and generate it directly onto your canvas.
Do I need a Canva Pro account to create professional business cards?
No. The free plan is sufficient for creating a professional business card. Canva Pro adds convenience features (like background removal and CMYK export) but isn’t required to produce a high-quality result.
What’s the best paper stock for printing business cards?
A 16pt cardstock with matte or gloss laminate is the industry standard for premium-feeling cards. For budget printing, 14pt uncoated cardstock still looks professional and is more affordable.


